
Author: Rachana Kadiam
Introduction to SSIS
- SQL Server Integration Services (SSIS) is a powerful data integration and workflow automation tool developed by Microsoft. It is a flexible ETL tool that facilitates the creation of data integration solutions, helping organizations manage and transform their data to meet business requirements.
- It is used for solving complex business problems by extracting from various sources like databases, flat files etc and transforming data, and loading data into one/ multiple destinations.
- It allows users to design and manage data integration processes through a graphical interface(GUI).
- Performs transformations to cleanse, aggregate, and manipulate the data before loading it into the target destination.
- SSIS packages, which are sets of workflows created in the SSIS development environment, can be scheduled and executed as part of ETL and provides automation of data integration scenarios.
- SSIS provides features for error handling, logging, and monitoring, allowing developers to identify and troubleshoot issues efficiently.
Your Data Journey Starts Here
Pre-requisities
- SSIS installed in Microsoft visual studio.
- SSIS extension packages for using Snowflake, Mongodb and AWS in the environment.(using MongoDB SSIS Components – SSIS Productivity Pack by kingswaysoft)
Steps
- For using SSIS , we are using Microsoft Visual studio(2019). Open visual studio and create a new project and in the search explorer find the SSIS executables and create a new package.
- We need to create connection managers for establishing a connection between different sources and destinations.
- For Creating a connection manager, right click on the connection manager area and create a new connection.
- Snowflake connection manager – fill in the required fields

Mongodb connection manager – fill the required fields and authentication modes and then test the connection.

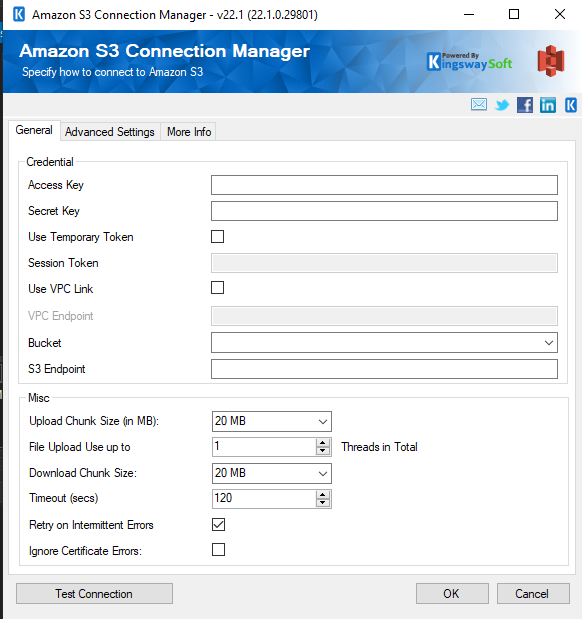
Amazon S3 connection manager – fill in the required fields
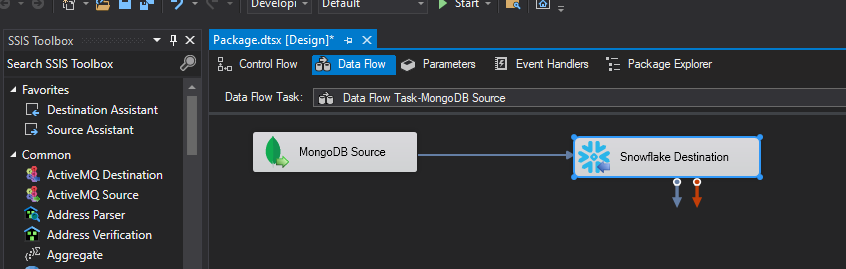
- Once the connection managers are set-up, we need to create a data flow task.
- Drag the data flow task component from the SSIS Toolkit.
- Drag the Mongodb source component and Snowflake destination component from SSIS Toolkit on to the data flow task.
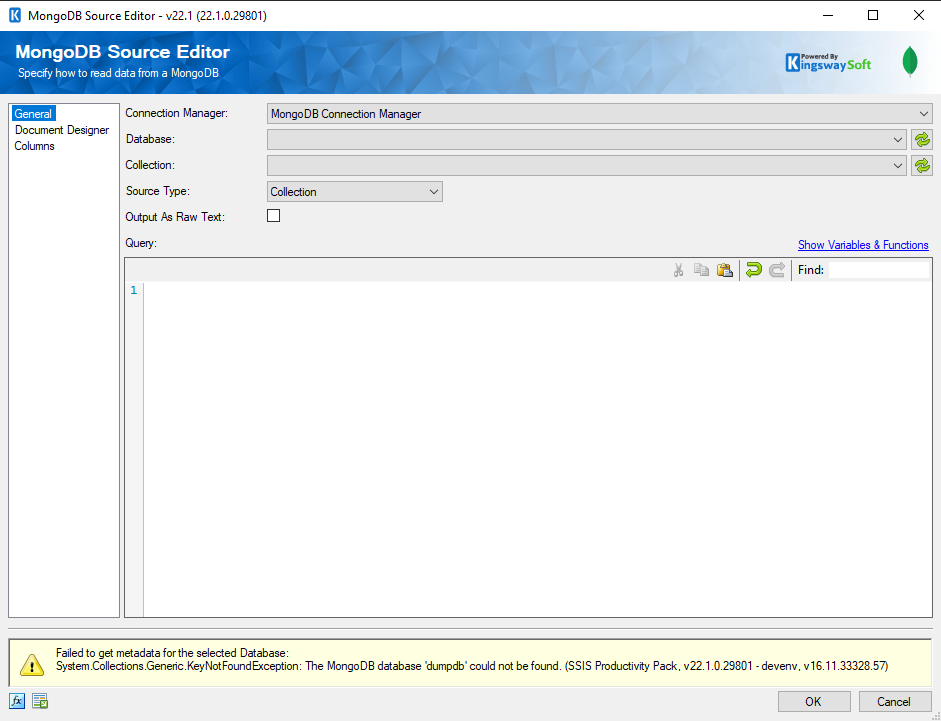
In Mongodb source component, select the database and collection from the drop-down. We will get the list of databases present in Mongodb server based on Mongodb connection manager.
- In document designer, we can update the data types of the columns if needed, And we can also add additional columns if required.
- In Snowflake destination component:

- Select the action you want to perform such as update, delete, insert
- Select the database, schema and destination table
- If we have huge data, then we have to use bulk copy, which uses the AWS S3 bucket as the intermediate location for storing the data and deletes once it’s loaded into a Snowflake table.
- We can specify the batch size based on our requirements.
Incremental Load
- If we want to load data incrementally, we have to create variables for storing the values

- Drag a Snowflake command task , add a Snowflake command here and then assign it to an output variable.
- Then we can use variables referenced here in the data flow task y dragging it from the variables section.
Conclusion
In this blog, we have seen how to extract the data from Mongodb to Snowflake using SSIS
References
November 23, 2023


